Fundamentals of Shear Testing

Though tension is the most common type of loading for material
testing, shear is also an important loading type. The behavior of
materials under shearing is important for many applications, including
forming, crash safety, and machine design. Accordingly, engineers have
created testing methods to isolate shear as the primary load so that
material shear behavior can be studied. This article will give a brief
overview of shear testing, including theory, equipment, methods,
results, and testing standards.
Relevance: Why Shear Testing?
Shear is essentially a type of loading that causes sections of
material to slide past each other. Strong shear loads are created
when two forces are applied to an object in opposite directions (we
can think of these directions as “up” and “down”) at different
locations. Resulting loads cause one section of material to deform
upward, while a neighboring section of material deforms downward.
With strong enough applied forces, the material will completely
shear apart.
Scissors are the most obvious example of shear loads at work in
everyday life. In fact, scissors are sometimes called “shears” for
this very reason! Scissors are a pair of sturdy metal blades that
almost align with each other, but not quite perfectly. When the
scissors are closed on a sheet of material, the blades push the
material in opposite directions, causing it to shear. Sharp scissor
blades aid in the shearing process, but many weak materials such as
paper can easily be cut even with blunt safety scissors. This is due
to their susceptibility to shear loads.
The relevance of shearing extends far beyond the use of scissors,
however. Any time a section of material is subject to two external
forces which are not equal and opposite, there will be shear. This
can manifest in structural beams, which experience tension, bending,
and shear forces. Many useful machine components are also designed
with shear in mind.
One example is the shear pin, which is incorporated into many types
of heavy machinery as a failsafe mechanism. If something goes wrong
during operation and the equipment experiences loads exceeding safe
limits, the shear pin is designed to fracture, disconnecting moving
parts and effectively stopping the machine. In this way, the shear
pin is sacrificed to ensure that nothing else in the machine is
damaged.
To ensure the effectiveness of components like the shear pin,
engineers must be able to predict how parts will behave under shear
loading. This is where material testing comes in.
Shear Testing Equipment
The objective of shear testing is to deform a material under shear
loading until fracture. Like most material tests, shear testing
takes stress and strain as quantities of interest.
Efficient shear testing methods tend to exploit techniques used in
other more common testing methods. For example, rather than
performing shear tests with a dedicated machine, shear testing is
usually designed to be compatible with the universal testing
machines (UTM) used in tensile testing. The key is to realize that
sample loading can be controlled by changing the sample geometry
rather than the external equipment. This allows shear testing to
use the same equipment setup as the uniaxial tension test.
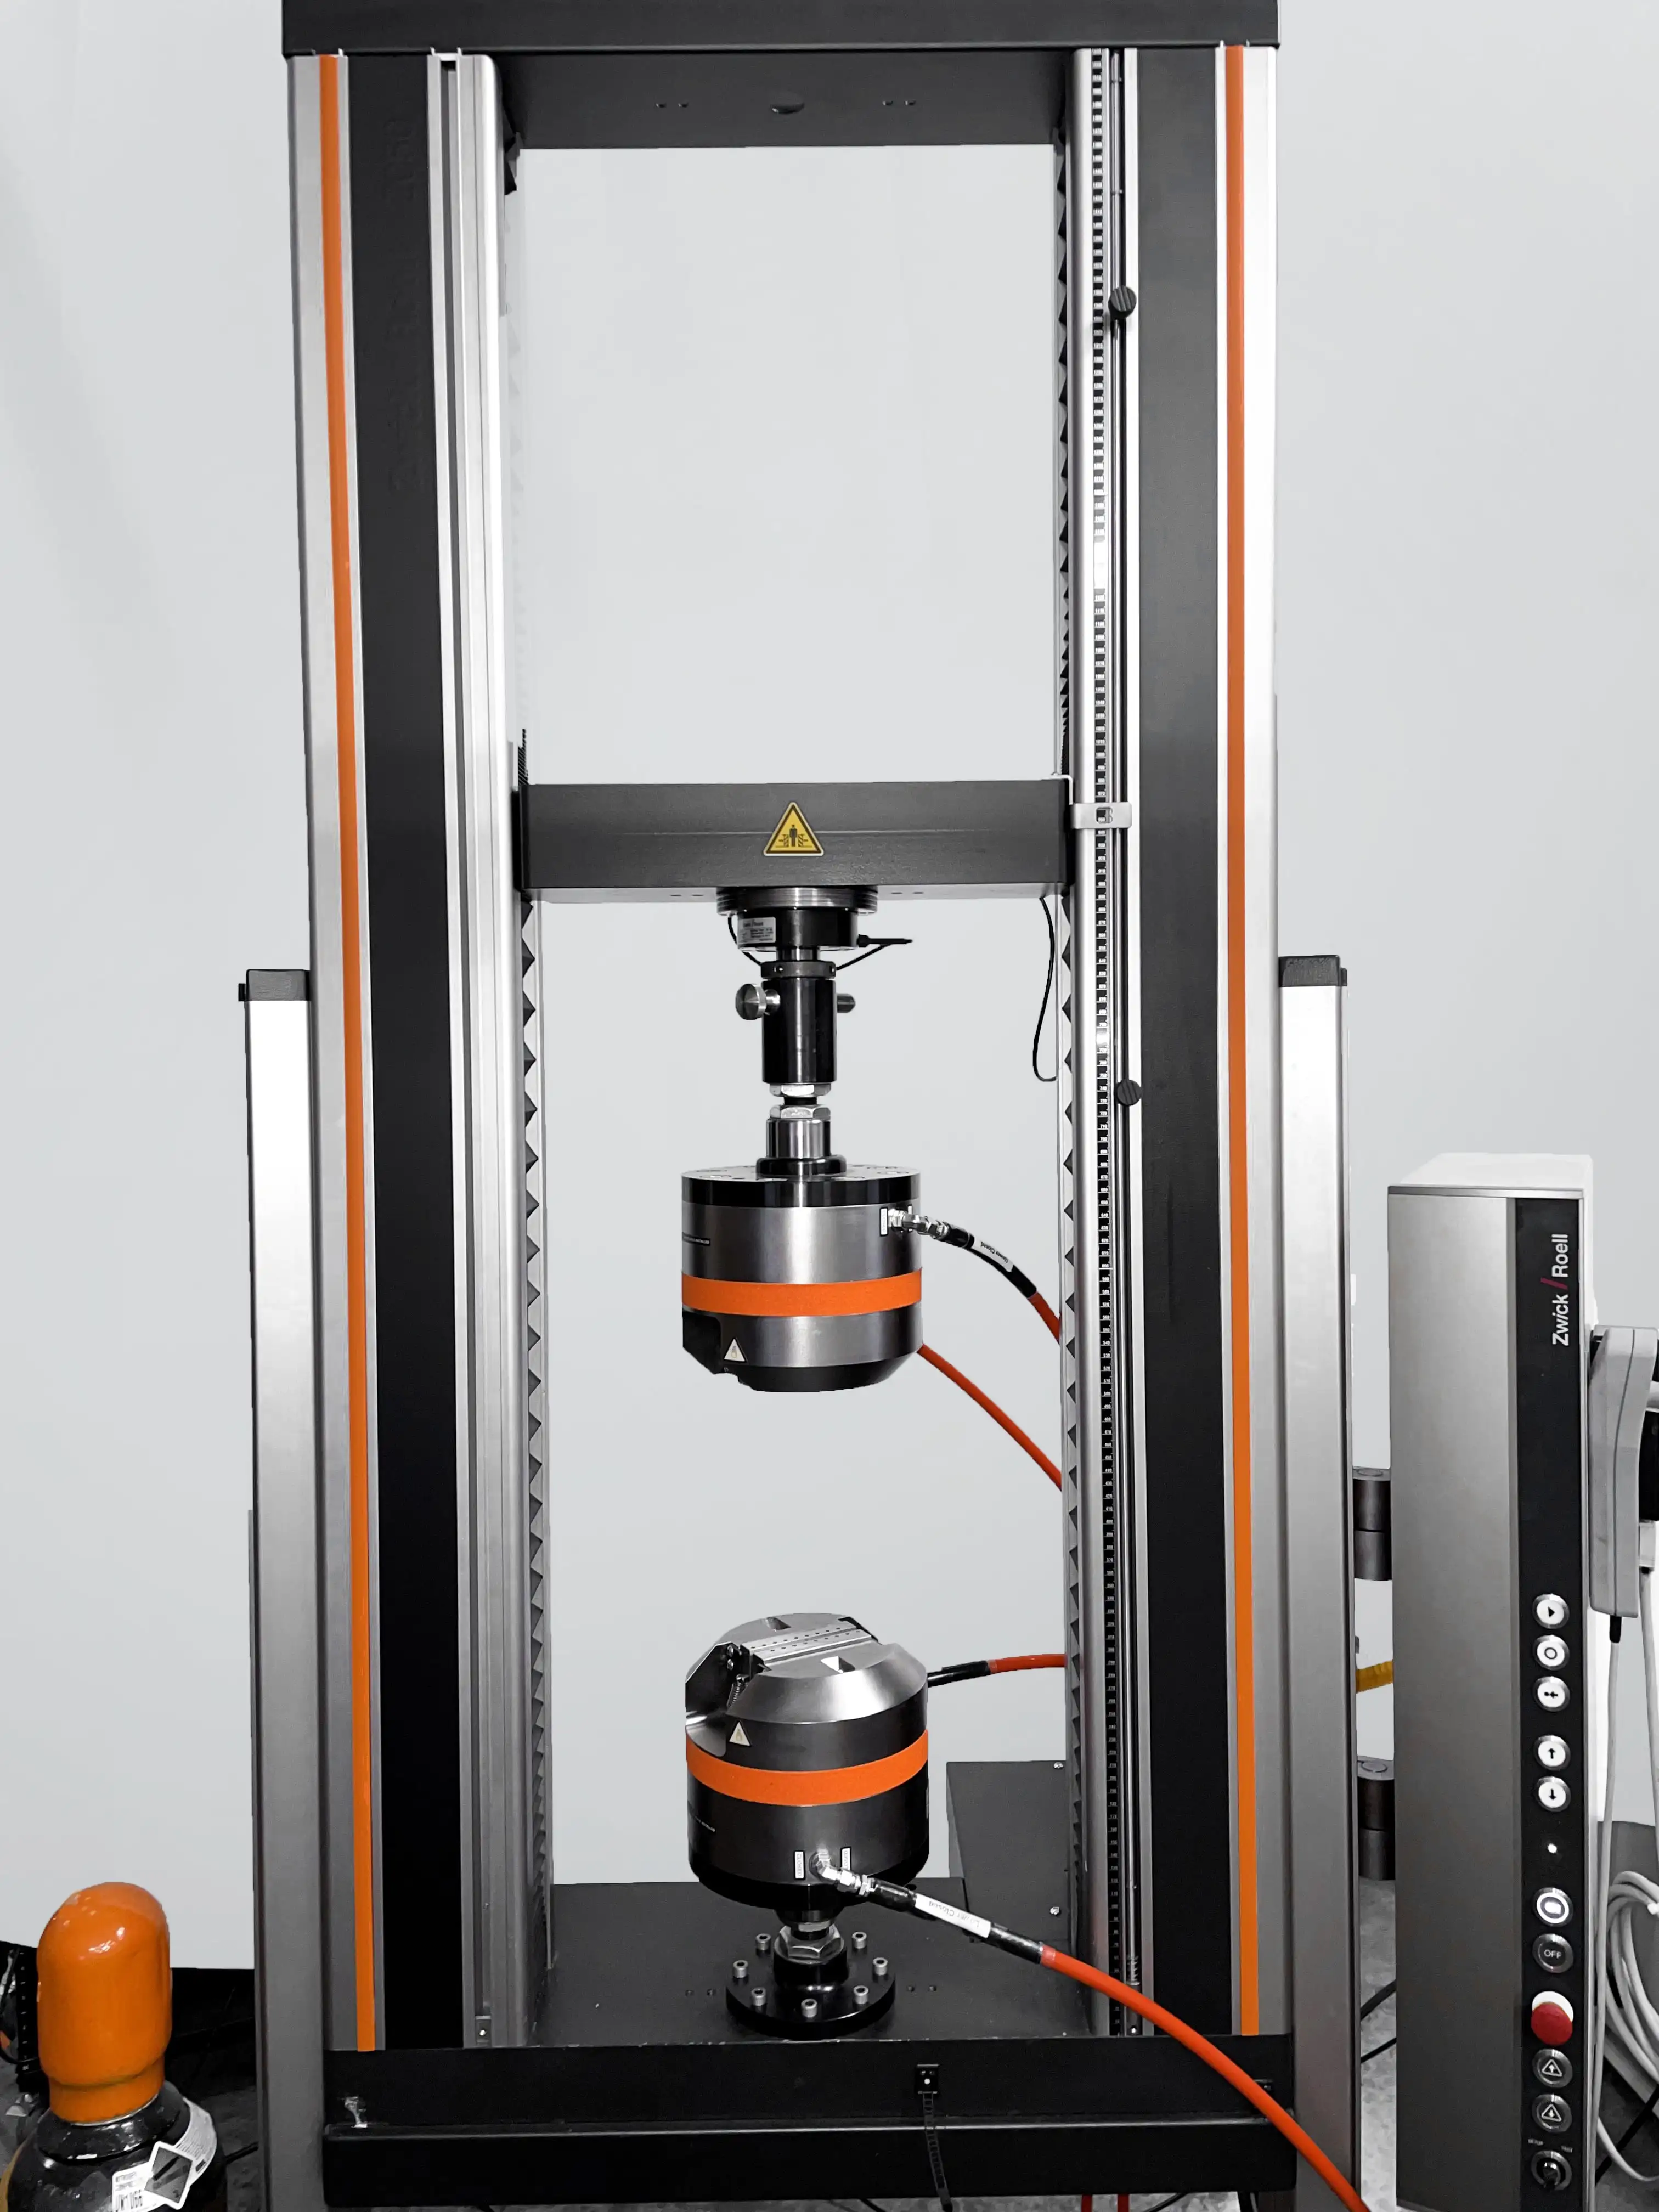
The primary piece of equipment is the universal tester or pull
tester. This machine is oriented vertically, with two grips to
hold the material test sample at both ends. The bottom grip is
static, while the top grip moves upward during the test, anchored
by the crosshead. The crosshead is a beam that can only move up or
down; the speed of a test can be expressed by referring to the
“crosshead speed.” Crosshead movement is tightly controlled by the
machine's drive system, which in turn is controlled by electronics
and dedicated test control software. The control software
typically directs the crosshead to move upward at a constant
speed, though other control methods such as strain rate control
can be used.

With shear testing, it is very important to align the test sample
vertically. This is because a small tilt in the sample orientation
can cause large differences in loading within the material.
Universal testing machines often provide built-in apparatus for
ensuring a proper sample orientation, such as markings for reference
or adjustable bumpers to brace the sample against.

Sensors are also crucial for any material test. Like the standard
tensile test, shear testing can utilize load cells and
extensometers to give forces and strains. However, traditional
extensometers cannot provide comprehensive strain information for
a shear test. This is because common physical strain sensors are
unidirectional (they only measure strain in one direction) and
only one sensor can be placed in each location on the material.
This makes it impractical to measure shear strain, which acts in
two directions at points in very close proximity to each other.
One can use special strain gages for shear loading, but that is
highly time consuming, and still has many practical measurement
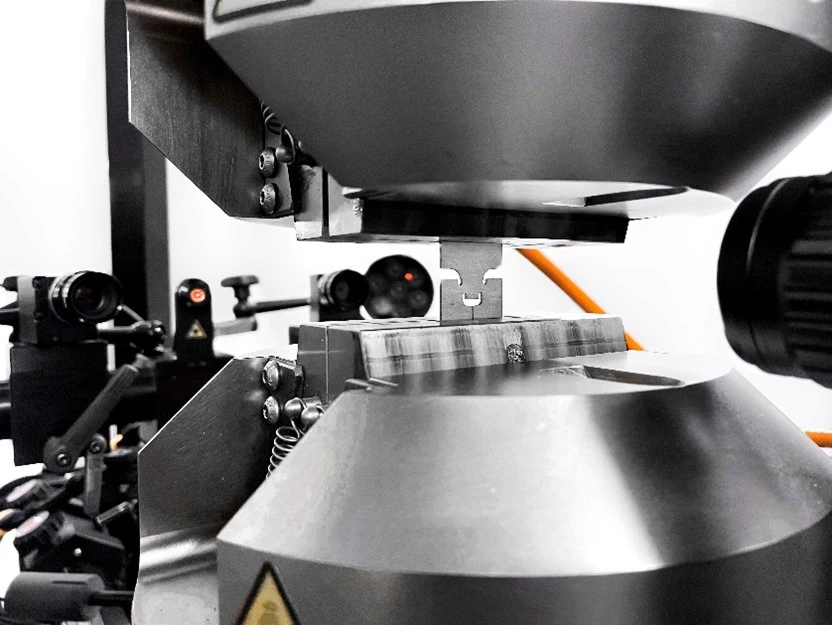
limitations. Instead, strain information is best provided using
digital image correlation (DIC). For DIC, the test piece is
painted in a speckle pattern and the entire test is filmed using
one or more cameras. The DIC software can compare the later images
to the initial “reference” image and calculate the displacement
(and thus, the strain) over the painted surface.
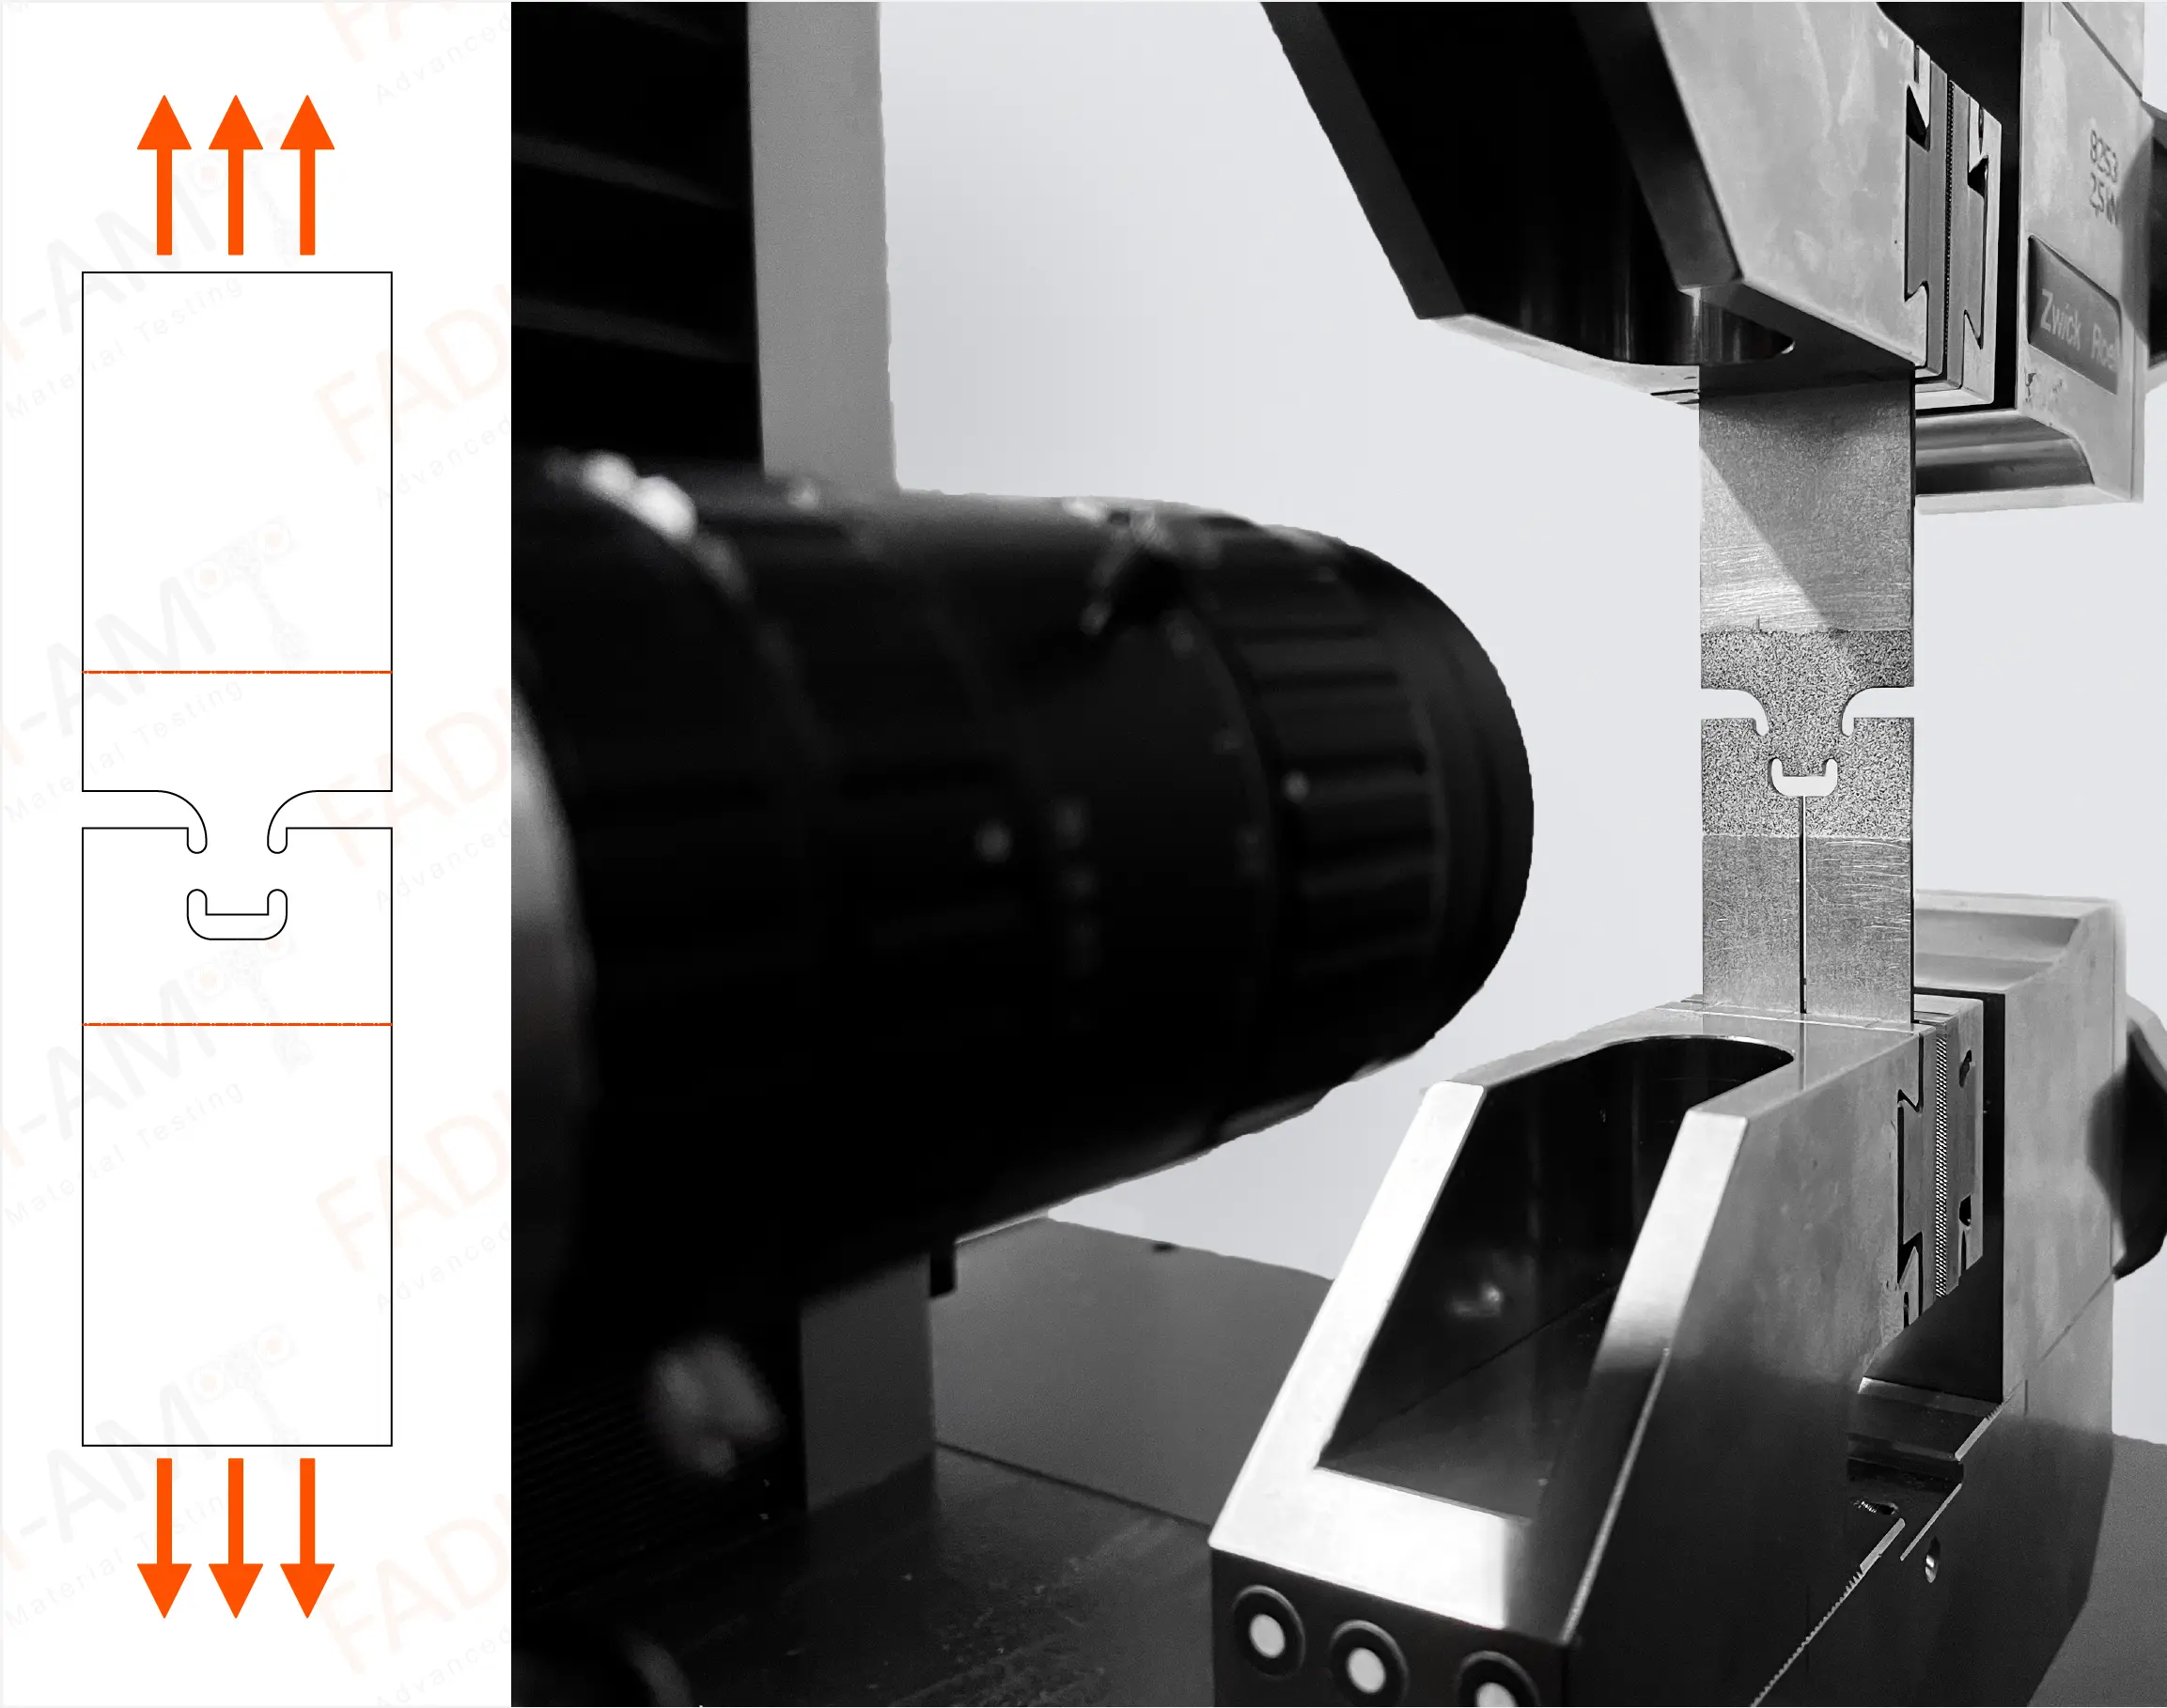
Shear Test Sample Geometry
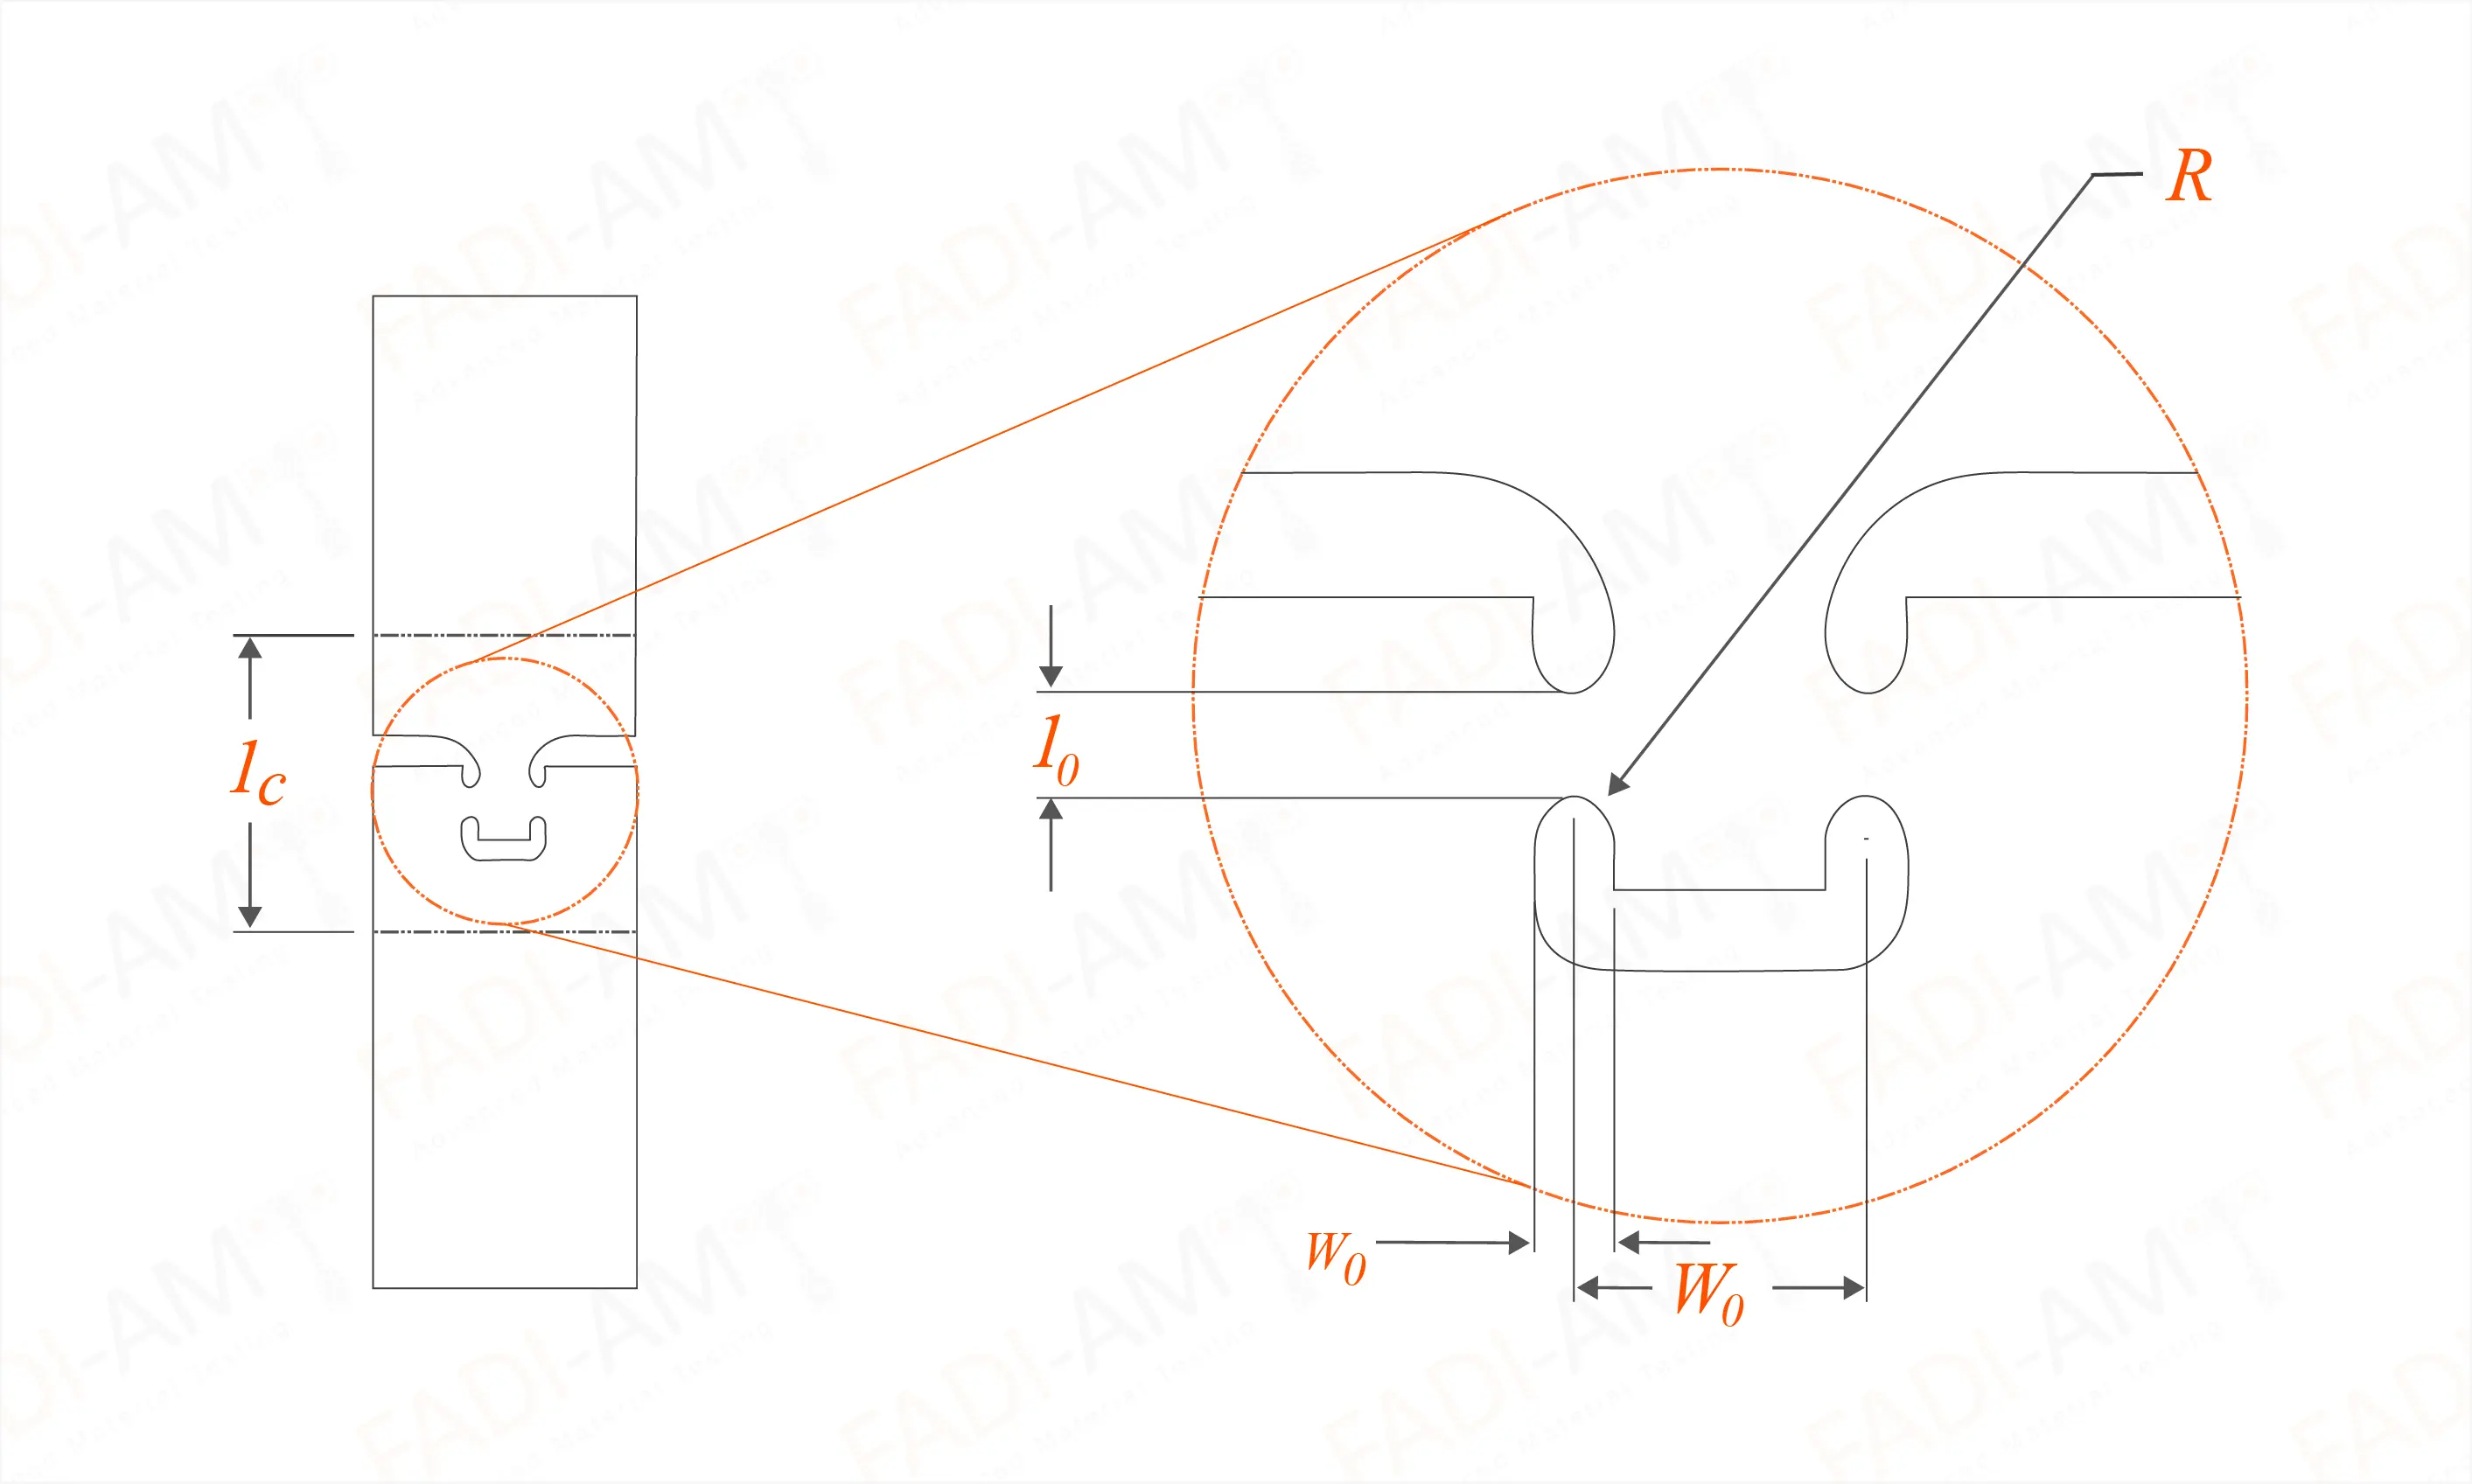
Shear testing requires a complex sample design compared to other
forms of pull testing. Because the objective is to fracture the
sample with a shear load, the sample is designed so that the
expected failure area is oriented perpendicular to the axis of the
testing machine.

Shear Sample Geometry
Because shear sample geometry is so intricate, several difficulties
arise when preparing and testing shear samples. Sample cutting can
only be done by sufficiently precise cutting methods, such as wire
electric discharge machining (Wire EDM); other methods such as
waterjet cutting and milling can be used but make it difficult to
create shear samples within an acceptable tolerance!
Shear Testing Method
The video below shows the Shear Testing method
Shear Testing Results
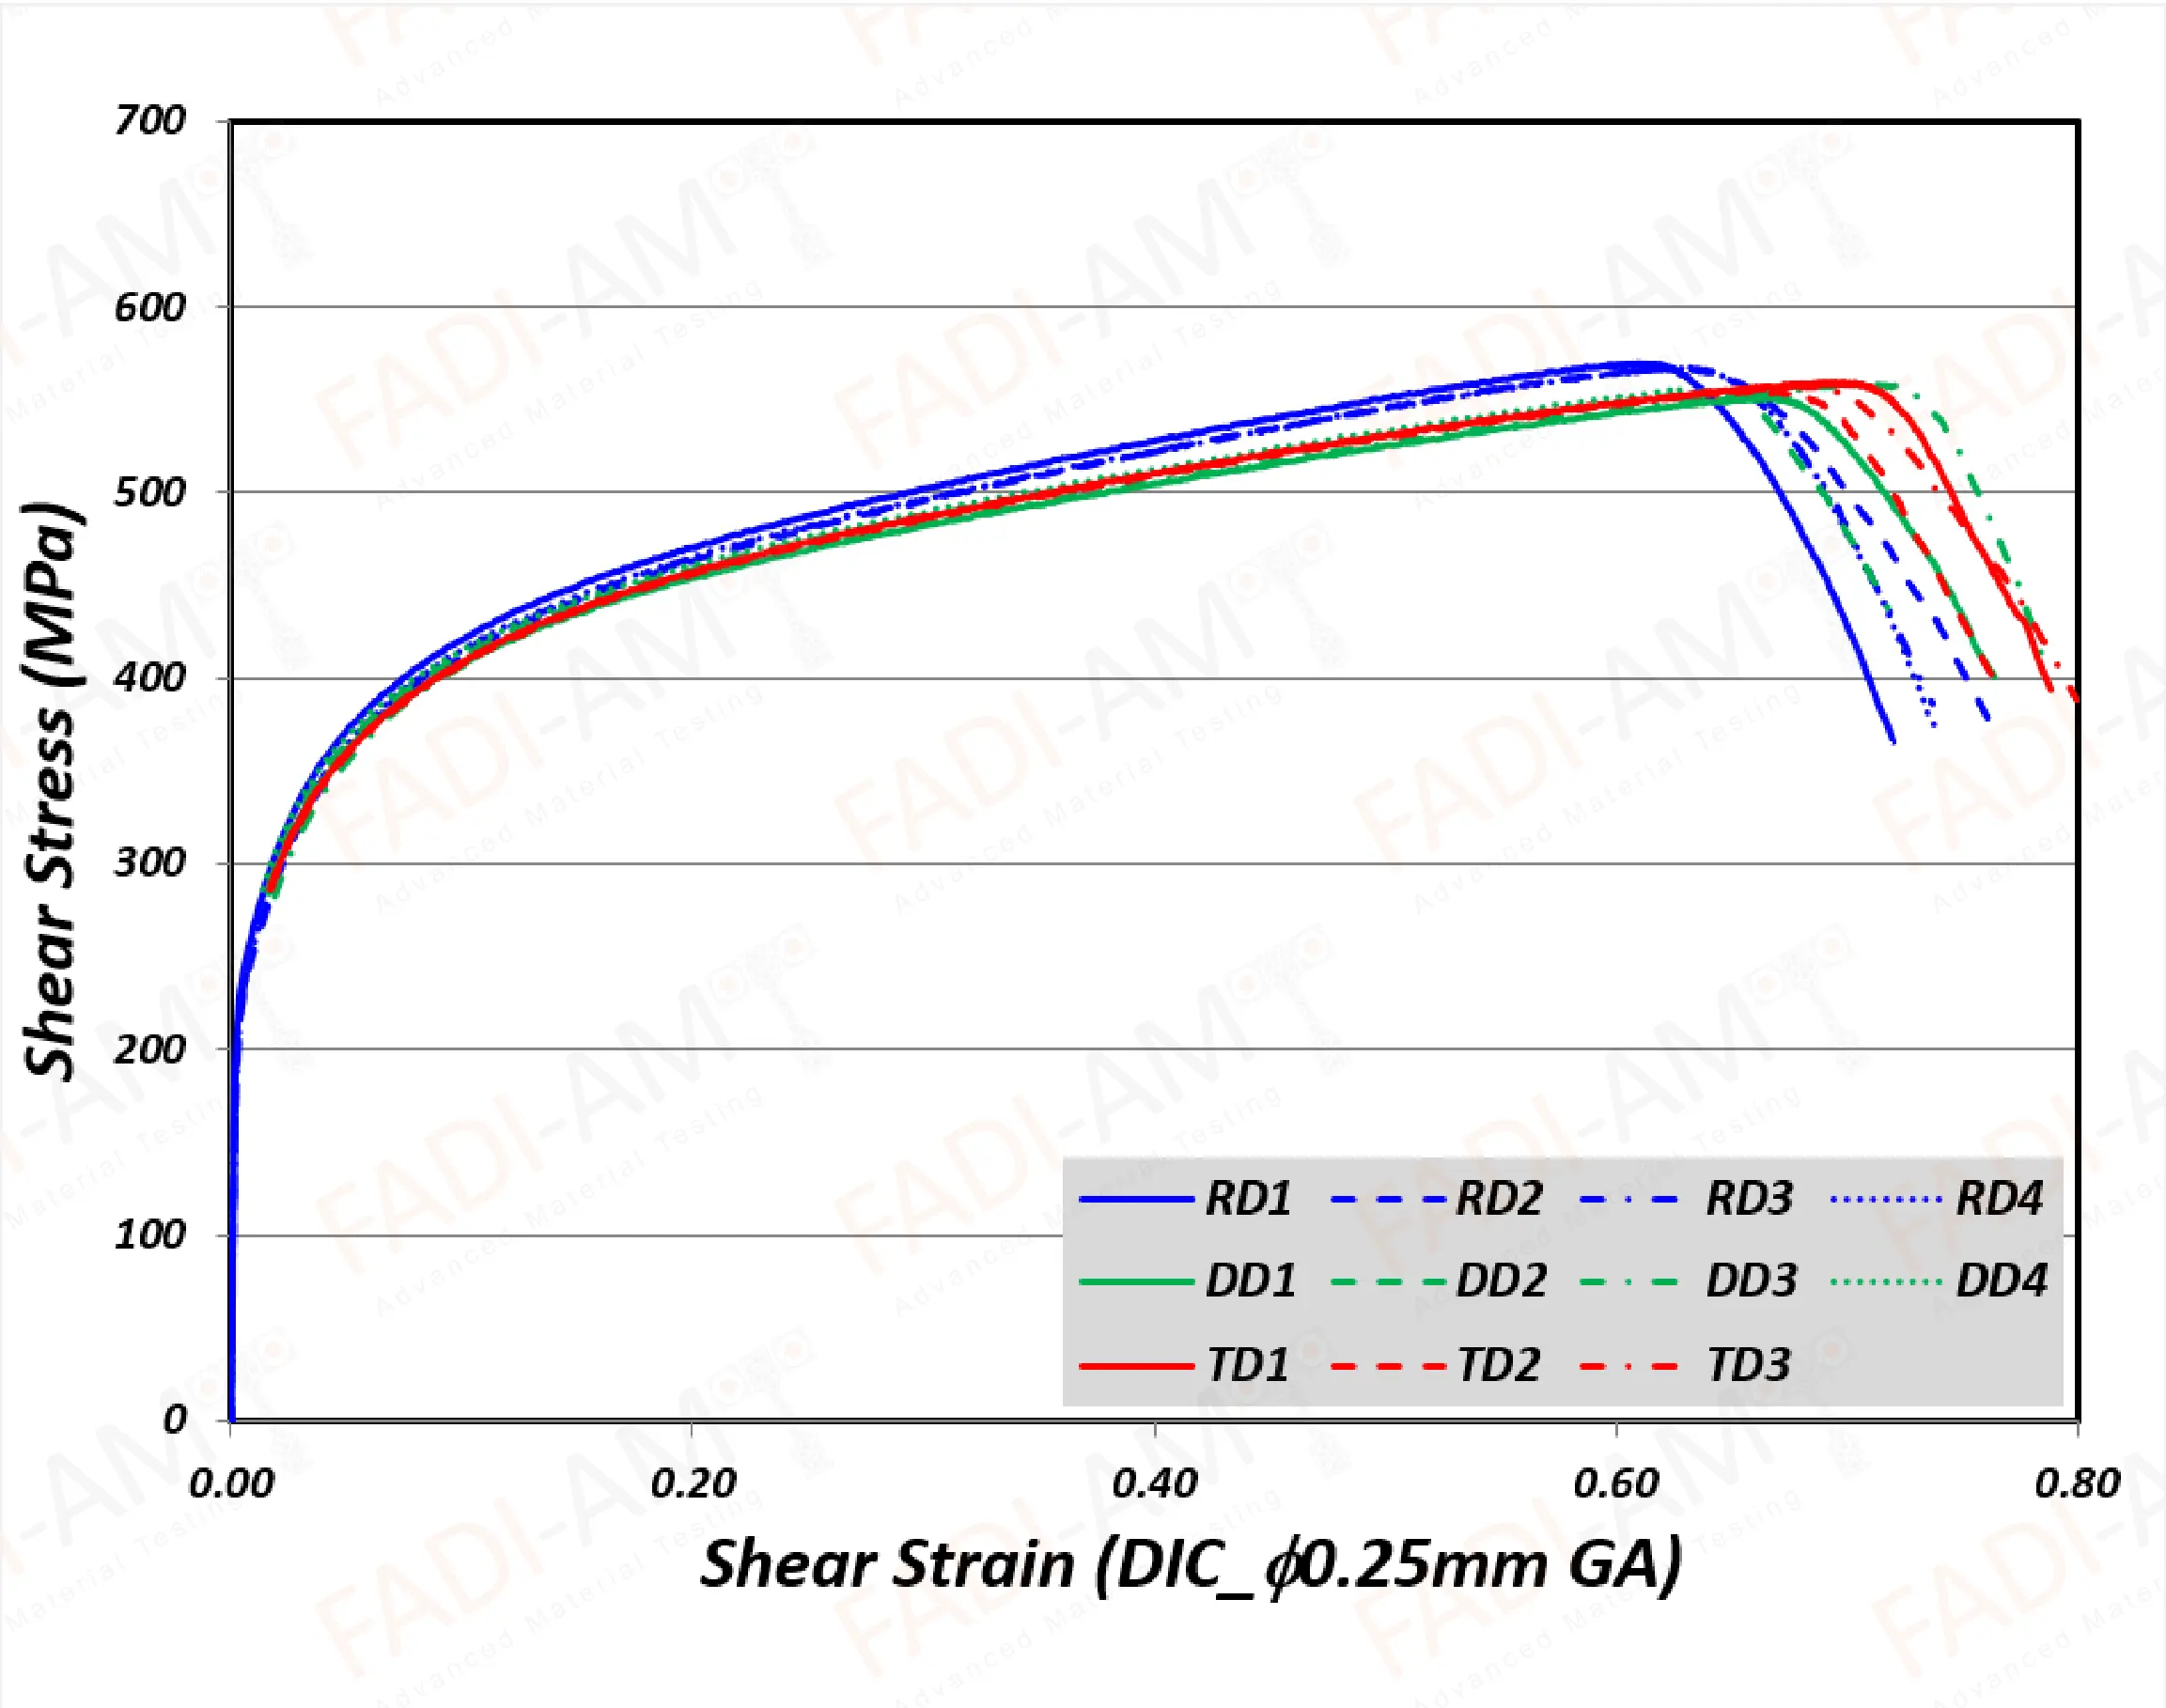
Using data from the test sensors, a shear stress strain curve can be
determined for the material. Like the more common tensile
stress-strain curve, the shear curve plots the stress in the
material at every time during the test against the measured strain
at that time. However, stress-strain curves derived from shear
conditions will look very different from those derived from uniaxial
loading, even for the same material. Knowledge of the relevant shear
stress-strain curves can be very useful when engineers work with
materials that are expected to undergo strong shearing conditions.

Shear Testing Results-Stress Strain Curves
Shear Testing Standards
Though standards such as ISO 4587, ISO 898, ASTM D1002, and ASTM
F606 cover shear testing for components and part interfaces,
international standards do not currently exist covering shear
testing for metal material samples.
